Is everyday a rainbowlicious day for you?
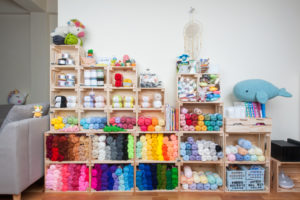
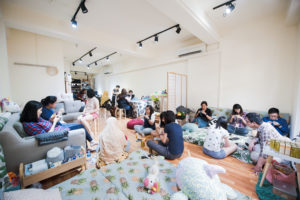
It has been for us at the TRH this past month as we’re doing a BIG makeover for our studio in Chinatown!

This Saturday is our official housewarming party and the theme is UNICORN!
Feel free to bring your amigurumi creations over for a magical gathering! And enjoy a fantasy experience with the TRH family where we do crafts to bring your imagination to life.
Find out more over here.

To reciprocate the warm support we have gotten from everyone these past 18 months, TRH will be sharing this Tokidoki Unicorno Amigurumi Pattern with everyone!
Let’s join hands together to bring more unicorns into existence!
In addition, we are also honoured to have received a HUGE present box, full of yarns from Patons.
The yarns are from the Patons 100% cotton (mercerised cotton, machine washable) range. It’s 4 ply, fairly thin with a good variety of colours.
For those wondering what mercerised cotton is…
According to the well-established yarn company – Lion Brand Yarn,
…mercerisation is a way of treating cotton that makes it stronger and more receptive to dye. After the process you have a smooth, luminous yarn that is easy to care for…
Sounds complex? We thought so too. Basically, the mercerised cotton yarns look really lustrous. Creations made with mercerised cotton yarns have a much more refined appearance compared to those made with normal cotton yarns, which are still nice and soft.
Mercerised cotton yarns are also more durable, so you’ll feel more secure if you were to make a bag or carrier with it.
Do try out mercerised cotton yarns to give your plush a clean and refined look!
As such, we have included below pictures of Stellina from Tokidoki made with 2 different set of yarns.

If you’re interested in using Puppy yarn (100% cotton/acrylic), click here to browse.
Please note that Stellina made using Puppy Yarn will be slightly larger.

If you’re looking to try the mercerised cotton Patons yarn (4 ply, 100% cotton, sleek), we’re happy to announce that TRH will be giving away a material kit including a set of Patons Yarns, a pair of black oval eyes and stuffing (worth 55 SGD) to complete the pattern!
To participate in this giveaway
Please show us your love for Tiny Rabbit Hole by:
- Posting a photo of any creations that you have made with TRH’s patterns on your IG or FB,
- Tag us at @tinyrabbithole with the hashtag #ilovetrh.
The most creative photo will be selected and the prize will be presented at the Unicorn Day!
Deadline: 27 April 2018 (Fri), 23:59
This is an easy pattern provided that you have already attended our Tiny Rabbit Hole’s Beginner (Level 2) workshops or equivalent! If you have not, feel free to visit our Youtube to learn how to crochet a simple round ball.

If you would like to have a set of our Basic Crochet Toolkit, you may check them out here.
Also! Our lovely pink Etimo Tulip Crochet Hook Set is in stock! Grab yours now here!

Materials
- Polyfiber stuffing
- Yarn needle
- Stitch markers
- Sewing pins
- Scissors
Yarns, supplies, and tools can be found here.
Abbreviations (US Terms)
st(s) stitch(es)
sc single crochet
inc increase
(do 2sc in the same st)
dec invisible decrease
(combine 2 sts into 1)
slst slip stitch
ch chain stitch
Instructions
- Our amigurumi are mostly done in continuous rounds starting with a Magic Ring. You don’t need to end with a slip stitch. Do use a stitch marker to mark the last stitch of every round at all times.
- You may wish to download the Counter+ app to help you with your counting.
- Please crochet the stitches tightly to prevent the poly-fiber stuffing from showing. However, do not crochet too tightly, otherwise it’ll be difficult to continue.
- Be sure to push the washer down only the first screw of the safety eye, so as to prevent bulging.
- If you’re using a smaller washer, you have to push down twice.
- Always stuff your amigurumi firmly till the point that it feels bouncy.
- Always leave a long tail for sewing.
- When felting, ensure that the needle is perpendicular to object.
PATTERN

Head
Using yarn A
R1: sc 6 into magic ring………..(6sts)
R2: [inc] 6x……………………………(12sts)
R3: [sc 1, inc] 6x……………………(18sts)
R4: sc 18……………………………… (18sts)
R5: [sc 2, inc] 6x……………………(24sts)
R6: [sc 3, inc] 6x……………………(30sts)
R7: [sc 4, inc] 6x……………………(36sts)
R8-18: sc 36 (11 rounds)…….. (36sts)
R19: [sc 4, dec] 6x…………………(30sts)
R20: [sc 3, dec] 6x…………………(24sts)
R21: [sc 2, dec] 6x…………………(18sts)
Attach safety eyes between R11 and 12, 18 sts between eyes.
Start stuffing and continue as you go.
R22: [sc 1, dec] 6x…………………. (12sts)
R23: [dec] 6x…………………………. (6sts)
Break yarn and pull out the yarn tail.
Sew remaining stitches closed and weave in all ends.
Body
Using yarn A
R1: sc 6 into magic ring………….(6sts)
R2: [inc] 6x……………………………. (12sts)
R3: [sc 1, inc] 6x……………………..(18sts)
R4: [sc 2, inc] 6x……………………..(24sts)
R5: [sc 3, inc] 6x……………………..(30sts)
R6-8: sc 30 (3 rounds)…………….(30sts)
R9: [sc 3, dec] 6x……………………. (24sts)
R10-11: sc 24 (2 rounds)…………(24sts)
R12: [sc 3, inc] 6x…………………… (30sts)
R13-15: sc 30 (3 rounds)…………(30sts)
R16: [sc 3, dec] 6x………………….. (24sts)
R17: [sc 2, dec] 6x………………….. (18sts)
Start stuffing and continue as you go.
R18: [sc 1, dec] 6x……………………(12sts)
R19: [dec] 6x…………………………… (6sts)
Break yarn and pull out the yarn tail.
Sew remaining stitches closed and weave in all ends.
Ears (make 2)
Using yarn A
R1: sc 4 into magic ring……………..(4sts)
R2: [sc 1, inc] 2x……………………….. (6sts)
R3: [sc 2, inc] 2x……………………….. (8sts)
R4: [sc 3, inc] 2x……………………….. (10sts)
R5-7: sc 10 (3 rounds)……………….(10sts)
Break yarn and pull out the yarn tail.
Do not stuff. Do not stitch up.
Legs (make 4)
Using yarn B (or yarn G if using Puppy Yarn)
R1 sc 4 into magic ring…………….(4sts)
R2 [inc] 4x………………………………. (8sts)
Switch to yarn A
R3 sc 8 (back loops only)………….(8sts)
R4-6 sc 8 (3 rounds)…………………(8sts)
Break yarn and pull out the yarn tail.
Stuff lightly. Do not stitch up.
Wings (make 2)
Using yarn A
*Leave a long tail at the beginning as you will need to tie the yarn tails on both
ends together after completing each wing.*
Make a foundation chain of 10 ch. Starting on the second chain from the hook, sc 9.
R1: Ch1 and turn, sc 7
R2: (Do not ch1) Turn, sc 7 starting from the first stitch
R3: Ch 1 and turn sc 5
R4: (Do not ch1) Turn, sc 5 starting from the first stitch
Tail
Using yarn C
R1 sc 4 into magic ring…………..(4sts)
R2 [sc 3, inc]………………………….. (5sts)
R3 [sc 4, inc]………………………….. (6sts)
R4 [sc 1, inc] 3x………………………(9sts)
R5-6 sc 9 (2 rounds)……………….(9sts)
R7 [sc 1, dec] 3x……………………..(6sts)
R8 sc 6………………………………….. (6sts)
Cut yarn, and pull the yarn tail all the way through the last stitch. Stuff lightly.
Front mane
Using yarn B
R1: sc 4 into magic ring……………(4sts)
R2: [sc1, inc] 2x………………………..(6sts)
R3: [sc 2, inc] 2x……………………….(8sts)
R4: [sc 3, inc] 2x……………………… (10sts)
R5: sc 10………………………………… (10sts)
R6: sc 3, [inc] 4x, sc 3……………… (14sts)
R7: sc 3, [sc 1, inc] 4x, sc 3……….(18sts)
R8-9: sc 18 (2 rounds)………………(18sts)
R10: sc 3, [sc 1, dec] 4x, sc 3…….(14sts)
R11: sc 5, [inc] 4x, sc 5………………(18sts)
R12: sc 5, [sc 1, inc] 4x, sc 5………(22sts)
R13-14: sc 22 (2 rounds)…………..(22sts)
R15: sc 5, [sc 1, dec] 4x, sc 5 …….(18sts)
Start stuffing and continue as you go.
R16: sc 5, [dec] 4x, sc 5………………(14sts)
R17: [sc 5, dec] 2x………………………(12sts)
R18: [dec] 6x……………………………… (6sts)
Break yarn and pull out the yarn tail.
Stuff generously. Sew remaining stitches closed. Do not weave in all ends.
First mid mane
Using yarn D
R1: sc 4 into magic ring……………..(4sts)
R2: [sc1, inc] 2x………………………… (6sts)
R3: sc 6……………………………………. (6sts)
R4: [sc 2, inc] 2x………………………… (8sts)
R5-6: sc 8 (2 rounds)………………….(8sts)
R7: [sc 3, inc] 2x………………………… (10sts)
R8: [sc 4, inc] 2x………………………… (12sts)
R9: [sc 5, inc] 2x………………………… (14sts)
R10: [sc 6, inc] 2x……………………….(16sts)
R11-15: sc 16 (5 rounds)……………(16sts)
Start stuffing and continue as you go.
R16: [sc 6, dec] 2x…………………….. (14sts)
R17: sc1, [sc 1, dec] 4x, sc 1………(10sts)
R18: [dec] 5x……………………………… (5sts)
Break yarn and pull out the yarn tail.
Stuff generously. Sew remaining stitches closed. Do not weave in all ends.
Second mid mane
Using yarn E
R1: sc 4 into magic ring………….(4sts)
R2: [sc1, inc] 2x………………………(6sts)
R3: sc 6…………………………………. (6sts)
R4: [sc 2, inc] 2x……………………..(8sts)
R5-6: sc 8 (2 rounds)………………(8sts)
R7: [sc 3, inc] 2x……………………..(10sts)
R8: [sc 4, inc] 2x……………………..(12sts)
R9: [sc 5, inc] 2x……………………..(14sts)
R10-13: sc 14 (4 rounds)………..(14sts)
Start stuffing and continue as you go.
R14: sc1, [sc 1, dec] 4x, sc 1…..(10sts)
R15: [dec] 5x……………………………(5sts)
Break yarn and pull out the yarn tail.
Stuff generously. Sew remaining stitches closed. Do not weave in all ends.
Last mid mane
Using yarn F
R1: sc 4 into magic ring…………(4sts)
R2: [sc1, inc] 2x……………………..(6sts)
R3: sc 6………………………………… (6sts)
R4: [sc 2, inc] 2x…………………….(8sts)
R5-6: sc 8 (2 rounds)……………..(8sts)
R7: [sc 3, inc] 2x…………………….(10sts)
R8: [sc 4, inc] 2x…………………….(12sts)
Start stuffing and continue as you go.
R9-10: sc 12 (2 rounds)…………(12sts)
R11: [dec] 6x………………………….(6sts)
Break yarn and pull out the yarn tail.
Stuff generously. Sew remaining stitches closed. Do not weave in all ends.
Horn
Using yarn C
R1: sc 4 into magic ring…………(4sts)
R2: [sc 1, inc] 2x…………………….(6sts)
R3: sc 6 ……………………………….. (6sts)
R4: [sc 2, inc] 2x…………………….(8sts)
R5-6: sc 8 (2 rounds)……………..(8sts)
R7: [sc 3, inc] 2x…………………….(10sts)
Break yarn and pull out the yarn tail.
Stuff lightly. Do not stitch up.
Assembly
- Assemble tip of body to base of head
- Secondly, stitch all the manes to the head starting from the front mane.
- Thirdly, stitch the horn to the front mane
- Next, stitch the ears to either side of the mane
- Stitch the legs to all corners of the body, with hooves pointing outwards
- Stitch the tail to the butt
- Finally, stitch on the wings to the body

Hope that you like our pattern! Do share your creations with us by tagging @tinyrabbithole and the hashtag #TinyRabbitHole on Facebook or Instagram, we’d love to see them!
Copyright
Tokidoki is a Japanese-inspired lifestyle brand created by Italian artist Simone Legno, together with business partners Pooneh Mohajer and Ivan Arnold.
The creation of Stellina is inspired by tokidoki and the amigurumi pattern was created by Angie Ng of TinyRabbitHole.com. All our patterns are copyrighted to Tiny Rabbit Hole and are for personal use only. Our patterns (in whole or in part) may not be reproduced, distributed or resold, translated, published, altered, shared or posted (for sale or free) over the Internet or offline.
Any image(s) of a product based on this design, be it digital or physical, whether 100% accuracy or with slight modification, produced in past or present, credit must be given in the following format: “Pattern and design by Angie Ng of TinyRabbitHole.com” and tag @tinyrabbithole on Instagram if the aforementioned image(s) are shared on Instagram.
You may place a link to this pattern from your site, but please do not repost it on your own page. For more information on our copyright policy, please click here.
Note
- This is not a sponsored post. All reviews and opinions are solely based on the author’s taste =) If you would like us to feature you, please write in to us at hello@tinyrabbithole.com. Thank you!
- Enjoy and share your pics with us via Instagram or Facebook. If you’re using our pattern, please tag and hashtag us at @tinyrabbithole. Thank you!


